文章目录
- 前言
- 第一节、创建镜像中心
- 第二节、测试完整流程
- (1) 创建账号
- (2) 推送镜像
- (3) 退出登录
- 第三节、扩展内容
- 1. 多个私服的配置
前言
搭建一个私服docker镜像中心,并且需要安全认证和后台管理。

本文基于mkuchin/docker-registry-web提供的案例来搭建服务。
https://github.com/mkuchin/docker-registry-web
第一节、创建镜像中心
- 下载并解压(github国内比较慢,如果下载失败的话,多尝试几次)
curl -Ls https://github.com/mkuchin/docker-registry-web/releases/download/v0.1.2/examples.tar.gz | tar -xzv

- 切换到目录
cd examples/auth-enabled/

- 使用脚本生成私钥和自签名证书:
./generate-keys.sh

-
修改配置,进入conf/registry目录,修改ip,如果是本机测试,则不需要修改。

-
启动
#启动
docker-compose up
#或者后台启动
docker-compose up -d

- 访问地址:http://106.13.2.249:8080/,用户名和密码是admin/admin

进去之后,里面是空的。

到这里服务器构建成功了。
第二节、测试完整流程
(1) 创建账号
- 打开刚刚的网址:http://106.13.2.249:8080/,创建一个账号hello,密码hello,角色分配为write-all


(2) 推送镜像
- 修改配置
vim /etc/docker/daemon.json
添加信任的私服
{ "insecure-registries": ["106.13.2.249:5000"] }

- 重新加载配置和重启
# 重新加载某个服务的配置文件
systemctl daemon-reload
# 重新启动 docker
systemctl restart docker
- 拉取一个镜像用来测试
#拉取镜像用来测试
docker pull hello-world
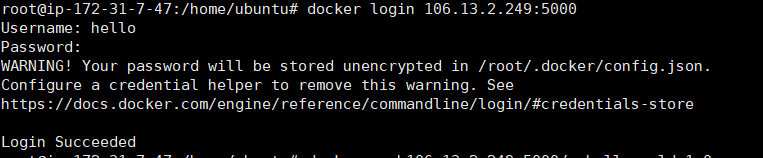
- 登录服务器,输入创建的用户名和密码为hello/hello
docker login 106.13.2.249:5000
- 推送镜像到私有仓库((需要在登录状态下执行))
#标记镜像
docker tag hello-world 106.13.2.249:5000/myhello-world:1.0
#推送镜像到私有仓库
docker push 106.13.2.249:5000/myhello-world:1.0

访问web也可以查看到刚刚推送的镜像。

注:如果不登录,直接push就会提示需要认证。

- 拉取镜像(需要在登录状态下执行)
#拉取镜像前,可以先删除hello-world镜像,避免使用本地镜像
docker rmi -f  镜像id
#拉取刚刚推送到服务器的镜像
docker run 106.13.2.249:5000/myhello-world:1.0

(3) 退出登录
docker logout 106.13.2.249:5000
第三节、扩展内容
1. 多个私服的配置
vim /etc/docker/daemon.json
添加信任的私服,填写多个ip和端口
{ "insecure-registries": ["106.13.2.249:5000","106.13.2.250:5000"] }